Wine Bottle Bird Feeder

Yesterday, I finally completed my bird feeder. I just grabbed some scrap pieces of wood from another project, an empty bottle (at the last minute I switched from a wine bottle to a rum bottle) and a shot glass.
The rum bottle has the words to one of my favorite songs by Kenny Chesney. I even have some old blue wooden Adirondack chairs on my porch.
There's a blue rocking chair, sittin' in the sand
Weathered by the storms and well oiled hands
It sways back and forth with the help of the winds
It seems to always be there like an old trusted friend
Supplies
- 20" or more piece of wood (a 4x1) = FREE scrapes from other projects to $2
- Bottle of your choice = FREE (after drinking it or ask a friend!)
- Shot glass (optional)
- Paint (optional)
- 4 screws = $1
- Picture hanger (optional) $1
- Drill with a small bit and a hole making bit (hope you already have one or a friend's)
- Screwdriver
Total = Less than $5
First measure your bottle to see how long it is and then add another 1-2" to that measurement. That will be your backboard. My finished cut wood was 13". Then cut two more 3.5" to make two perfect squares. Remember, a 4x1 is really 3.5" wide not 4".

Next, you need to find the center of the squares and mark them. With your drill and hole bit, cut a hole all the way through one and only 1/2 through the other. As you can see, when cutting mine, I was a little off. Oh well! That's me, a little "off". It still worked out OK. But try to be more accurate than me.

Now it is time to attach it all. I suggest putting it together with it laying down to get it exactly like you want it, then marking where the squares will go with a pencil. This will help you mark where to drill the pilot holes.
Then drill four pilot holes in through the long board where you want to attach the squares. Insert the screws and screw them in the back of the squares. Again, mine ended up a little crooked. I am starting to think I should change the name of this blog to Drunken Crafts.

Sit your bottle in it to make sure it is how you like it. If not, you can unscrew it and adjust the squares, if needed.
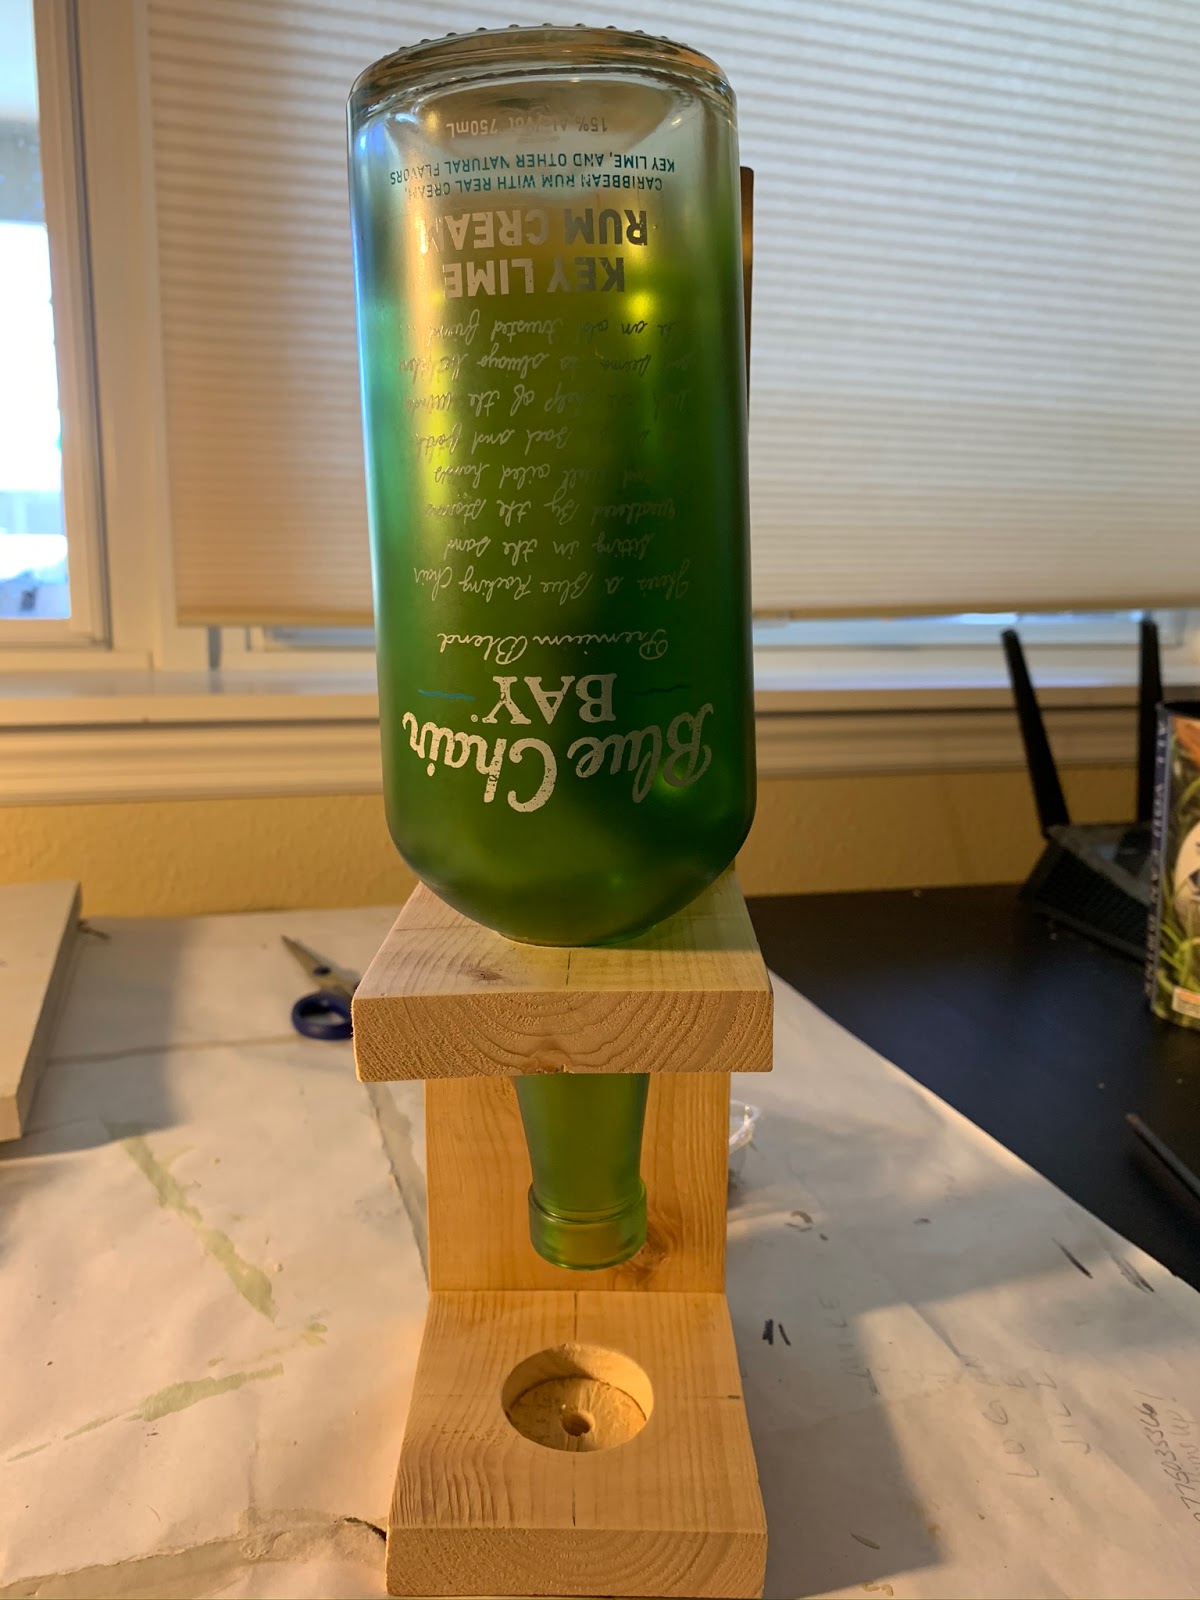
Now, I say the shot glass is optional. If you don't have one, or don't want to use a good one, or just don't like it, you don't need it. Just lower the squares holding your bottle so the opening is closer to the divot your cut out. This will allow the seeds to pool a little for your birds without it going everywhere. Or you can use a small bowl instead.

Painting is also optional if you like the natural look. I went with some old gray paint I already had.

And then I nailed a picture hanger to the back. Again, this is optional. If you are going to set yours on something flat, you don't need it. But if you are hanging it like me, you will need it. I used a zip tie but you can use some rope, or whatever you want, to hang it.

Then fill the bottle with bird seed, carefully insert it, and wait for your feathered friends to arrive!


Comments
Post a Comment